A premium grab bar installed incorrectly is less safe than a basic model mounted properly. The difference between a secure handhold and a dangerous liability comes down to installation technique, not brand name or finish.
Most bathroom falls occur during transfers - standing from the toilet, stepping over the tub edge, or shifting weight in the shower. These moments generate forces between 250 and 400 pounds, far exceeding body weight. A grab bar that seems solid under light pressure can tear free under transfer loads if the mounting method cannot handle sudden, directional force.
The single most common failure point is insufficient wall anchoring. Drywall anchors, toggle bolts in hollow walls, and mounting into thin tile backing all create false confidence. The bar feels firm when you pull gently, but it has no structural connection capable of stopping a fall. This failure mode is predictable and preventable.
Installation decisions break into two categories: permanent mounting into structural framing, and temporary solutions using suction, compression, or adhesive. Permanent installations require locating studs, drilling through tile or fiberglass, and fastening to solid wood or blocking. Temporary systems avoid wall penetration but impose strict limits on weight capacity, surface compatibility, and adjustment frequency.
This guide walks through the most frequent installation errors in order of consequence. Each mistake is tied to a specific failure mode, with comparison points to help you choose between drilling into studs, adding blocking, or using verified suction mounts. The goal is not perfection - it is a secure attachment that will not move when you need it most.
Before purchasing hardware or picking up a drill, use this article as a pre-installation checklist. Compare your wall type, stud spacing, and user weight against the mounting method. Identify whether your bathroom allows permanent fasteners or requires a removable system. The decisions you make before the first screw goes in determine whether the grab bar functions as a safety device or a hazard.
Who Needs to Get Grab Bar Installation Right
Getting grab bar installation right matters most to three groups: adult children installing bars for aging parents, homeowners planning to age in place, and renters or temporary residents who need safe solutions without permanent modifications.
If you're installing bars for a parent, you're balancing immediate safety needs with the reality that you may not be present for daily use. The installation must be secure enough to handle unexpected weight shifts, slips, and the full body weight of someone losing balance. Mistakes here aren't abstract - they can lead to falls when no one is nearby to help.
Homeowners preparing their own bathrooms for long-term use face a different calculation. You're investing in your own future mobility and independence. The bars you install today may need to support you through decades of changing strength and balance. Choosing the wrong placement now means living with awkward reach angles or reinstalling later, leaving behind patched screw holes and damaged tile.
Renters and those in temporary living situations need solutions that provide real stability without violating lease terms or requiring wall penetration. Suction-cup and tension-mounted bars exist for this purpose, but they come with strict weight limits and surface requirements that are easy to misjudge.
Regardless of which group you fall into, your installation method depends on three physical factors: wall type, required weight capacity, and whether permanent mounting is feasible.
Wall type determines your anchoring strategy. Drywall requires hitting solid wood studs or using blocking between studs for secure attachment. Tile installations demand careful drilling to avoid cracking, plus longer screws that penetrate through tile and cement board into studs. Fiberglass shower surrounds are the most challenging - the material itself cannot support grab bar loads, so you must locate and fasten into the structural framing behind the surround, often requiring longer fasteners and careful measurement to avoid damaging the fiberglass face.
Weight capacity needs vary by user. A 120-pound person who needs light balance support during showering has different requirements than a 250-pound individual who may need to catch their full falling weight. Most building codes and ADA guidelines specify that grab bars should withstand 250 pounds of force in any direction, but this assumes proper installation into structural members. The same bar installed into drywall anchors alone might hold 50 pounds before pulling free.
Permanent mounting is the gold standard for safety - through-wall fastening into solid blocking or studs provides the most reliable support. But permanent isn't always possible. Rental agreements, historic tile you don't want to drill, or the absence of studs in the right location all create constraints. In these cases, understanding the real limitations of non-permanent options - and being honest about whether they meet your actual needs - is essential to avoid a false sense of security.
Mistake #1: Mounting Into Drywall Without Hitting Studs
Mounting a grab bar into drywall alone is the most dangerous installation mistake you can make. Drywall is a finishing material, not a structural support - it crumbles under the lateral and downward forces that occur when someone grabs a bar for balance or to prevent a fall. Even heavy-duty drywall anchors rated for significant weight are tested under ideal, straight-pull conditions that don't replicate the twisting, jerking motions of real-world use.
Wall studs - the vertical wooden or metal framing members behind your drywall - provide the only reliable anchor points for weight-bearing grab bars. A properly installed grab bar should be fastened with screws that penetrate at least 1 inch into solid wood studs or blocking. This creates a connection strong enough to support 250 pounds or more, the typical load rating manufacturers design for.
Locating studs in a bathroom can be tricky, especially when tile covers the wall surface. A stud finder designed to work through tile is your best tool, though you may need to test in multiple spots to confirm accuracy. Tapping along the wall and listening for a solid sound rather than a hollow one can help verify stud locations. Once you've identified a stud, measure 16 or 24 inches to either side - standard stud spacing - to find the next one.
If studs don't align with where your grab bar needs to be installed for proper placement, you have two main options. The first is to install blocking: remove a section of drywall and secure a horizontal piece of 2x6 or 2x8 lumber between two studs at the height where the bar will mount. This creates a solid anchor point anywhere along that span. The second option is to use a grab bar specifically designed with a wider mounting plate that spans the distance between studs, allowing you to fasten into two studs even if they're not ideally positioned.
Toggle bolts that spread their load behind the drywall are sometimes suggested as an alternative, but they should be considered a last resort and only for very light assist bars in low-risk locations. They are not appropriate for grab bars that will bear significant weight or be used for transfer support. When a grab bar pulls out of drywall, the failure is sudden and complete - the user falls, and the damaged wall cannot be simply re-drilled. The risks far outweigh the convenience of skipping proper stud mounting.
Mistake #2: Installing at the Wrong Height or Angle
Placement errors undermine even the strongest mounting job. A grab bar installed at the wrong height or angle won't provide effective support when you need it most, forcing awkward reach or grip positions that reduce stability.
The most common height mistake is mounting bars too high. Many installers place horizontal bars at towel-bar height - around 48 inches - assuming higher is safer. In reality, standard grab bars should sit between 33 and 36 inches from the floor, measured to the top of the bar. This range allows most adults to grip comfortably while standing, sitting, or transitioning between positions. Mounting above 36 inches forces users to reach overhead, which compromises balance and makes the bar harder to use during a slip or fall.
Installing bars too low creates different problems. Bars mounted below 33 inches require excessive bending and offer poor leverage when standing up from a toilet or tub. Users with limited mobility find low bars especially difficult, as they can't generate enough upward force from a bent position.
Angle matters as much as height. Horizontal bars work well along tub walls and beside toilets for lateral support, but vertical or angled bars often provide better leverage for sit-to-stand transitions. A vertical bar next to the toilet gives users a natural pulling motion when standing, while a horizontal bar at the same location requires an awkward sideways pull. Many installers default to horizontal placement without considering how the bar will actually be used.
User-specific factors also determine correct placement. Taller individuals may need bars closer to 36 inches, while shorter users and children benefit from the lower end of the range. Someone who uses a wheelchair or has significant mobility limitations may need bars positioned for seated transfers rather than standing support. Failing to account for the primary user's height, strength, and movement patterns leads to bars that look right but don't function well.
Location within the bathroom is equally critical. The three highest-priority zones are beside the toilet, at the tub or shower entry, and near shower controls. A grab bar beside the toilet should extend from the front edge to several inches past the back, positioned on the wall closest to the user's stronger side. At the tub, a vertical bar near the entry point provides support during the step-in and step-out motions when slips are most likely. Inside the shower, a bar within easy reach of the controls allows users to steady themselves while adjusting water temperature.
Many installations ignore these functional zones entirely, placing bars in open wall spaces simply because the studs are accessible there. A grab bar on a blank wall six feet from the toilet offers no practical value during the moments when support is actually needed. Always prioritize placement at transition points - where users sit, stand, step, or reach - even if it requires extra blocking or different mounting hardware.
Before drilling, physically simulate the motions the bar will support. Stand where the user will stand, sit where they'll sit, and reach as they'll reach. Mark the bar location that feels most natural for those movements, then verify it falls within the 33-36 inch standard range. This simple check catches placement errors that aren't obvious on paper but become glaring once the bar is permanently installed.
Mistake #3: Using the Wrong Hardware for Your Wall Type
One of the most critical - and commonly overlooked - mistakes is using fasteners that aren't suited to your wall construction. The hardware packaged with most grab bars is designed for installation directly into wood studs behind drywall, but many bathrooms feature tile, fiberglass, acrylic surrounds, or other surfaces that demand different fastening strategies.
For standard drywall with accessible studs, coarse-thread wood screws (typically #10 or #12 diameter, 2.5 to 3 inches long) driven into solid framing provide the necessary holding strength. This is the simplest scenario and the one most manufacturers assume in their instructions.
Tile walls introduce complexity. You'll need to drill through the ceramic or porcelain without cracking it - using a carbide-tipped masonry bit at low speed - then secure the bar into the stud behind. If a stud isn't positioned where you need the bar, toggle bolts or screw-in metal anchors rated for at least 300 pounds can distribute load across the tile backer and framing. Never rely on plastic expansion anchors in tile applications; they lack the shear strength needed for a safety device.
Fiberglass and acrylic shower surrounds present the greatest challenge. These thin, flexible panels typically have an air gap between the surface and the actual wall framing, meaning screws have little material to grip. In most cases, fiberglass installations require backing plates or blocking installed behind the surround during construction, or retrofit mounting plates that spread force across a larger surface area. Some manufacturers offer spacer kits designed specifically for hollow-wall applications, but confirm the kit's load rating matches the bar's intended use.
The included hardware in your grab bar package is a starting point, not a universal solution. Before you begin drilling, identify your wall type, locate studs with a reliable stud finder, and purchase fasteners rated for both your wall material and the expected load. When in doubt, consult the bar manufacturer's installation guide for wall-specific recommendations, or work with a contractor experienced in accessible bathroom installations.
Mistake #4: Over-Relying on Suction-Cup Grab Bars for Primary Support
Suction-cup grab bars are widely available, easy to install, and require no drilling - but they should never be your primary support in high-risk transfer zones like the shower or beside the toilet. Understanding their limitations is essential to avoiding a dangerous fall.
Suction-mounted bars rely on a vacuum seal between a rubber cup and a smooth, non-porous surface. That seal can fail when exposed to temperature fluctuations, humidity, soap residue, or even minor surface imperfections. Over time, the suction weakens, and the bar can detach without warning - precisely when you're relying on it for balance or weight transfer.
These bars work best as supplemental aids in low-risk situations: a temporary handhold while recovering from minor surgery, extra stability on a short-term rental property, or an additional point of contact on a tile wall where a permanently mounted bar already provides primary support. They're useful on smooth glass, glazed tile, or acrylic surfaces that are clean, flat, and free of texture.
They are not appropriate for full body weight transfer, for users with significant balance or mobility challenges, or in any location where a fall would result in serious injury. If you're stepping over a tub edge, lowering yourself onto a shower bench, or rising from the toilet, a screw-mounted bar anchored into solid blocking is the only reliable choice.
When suction bars are used appropriately, inspect them daily: press firmly to confirm the seal, wipe the cups and wall with rubbing alcohol to remove oils and soap film, and replace the unit if the rubber shows cracks or loses elasticity. Never assume the bar is secure simply because it was yesterday. Suction is not a permanent fastening method - it's a convenience feature with real tradeoffs in safety and durability.
When to Call a Professional Instead
Some installation scenarios carry enough risk that professional help becomes a smart investment in long-term safety. Knowing when to call an expert isn't about skill level - it's about matching the job to the right tools, experience, and structural knowledge.
Consider professional installation when the ideal grab bar location has no accessible studs within the mounting area. Installing blocking boards between studs requires opening the wall, adding reinforcement, and refinishing - work that often needs carpentry experience and may involve drywall repair or tile removal. A poorly installed blocking board can shift under load, creating a dangerous false sense of security.
Drilling through tile presents another high-risk situation, especially for ceramic or porcelain. Without experience and the correct bit type, tiles can crack during installation, turning a simple project into an expensive repair. Professionals use specialized diamond-coated bits, proper drilling speed, and water cooling techniques that prevent heat damage and cracking.
Fiberglass tub and shower surrounds require different reinforcement strategies than drywall or tile. The thin fiberglass shell alone cannot support grab bar loads. Professional installers can assess whether the wall cavity allows for proper backing installation or whether surface-mounted reinforcement plates are needed - and they'll know how to seal penetrations to prevent water intrusion behind the surround.
When the person using the grab bar exceeds 250 pounds, or when medical conditions require additional support capacity, a structural assessment becomes important. Standard installations assume typical residential framing and average user weight. Professionals can evaluate whether existing studs, fastener types, and bar models meet the higher load requirements, or whether engineered solutions like through-bolting or steel reinforcement are necessary.
Finally, if you've started an installation and discovered unexpected conditions - rotted studs, unusual wall construction, or concealed plumbing or wiring - stopping and consulting a professional prevents both safety hazards and code violations. The cost of professional installation is modest compared to the consequences of a failed grab bar when someone depends on it for stability.
Testing Your Installation Before Relying on It
Even a perfectly installed grab bar requires verification before it becomes a trusted part of your daily safety routine. Testing your installation immediately and over time helps catch issues before they become dangerous.
Begin your initial test by holding onto another stable support - a second grab bar, a countertop, or have someone stand by for assistance. Apply weight gradually, starting with light hand pressure and slowly increasing to about half your body weight. Watch the mounting points carefully for any movement, flexing, or gaps opening between the flange and wall surface. A properly anchored bar should feel completely rigid with zero give or shifting.
Listen for any creaking, popping, or scraping sounds during this test. These noises often indicate that fasteners are shifting inside the wall or that a mounting plate is flexing against the surface. If you detect any movement or unusual sounds, do not use the bar until you've identified and corrected the problem.
After 48 hours of settling, re-check all mounting hardware. Temperature changes, wall material settling, and initial stress can cause fasteners to loosen slightly during the first two days. Use your wrench or screwdriver to verify that each screw or bolt remains tight. This simple step takes two minutes and significantly improves long-term stability.
Establish a monthly inspection routine. Visually examine each mounting point for gaps, cracks in the wall surface, or rust stains that might indicate moisture penetration. Grasp the bar firmly and apply moderate downward and outward pressure to confirm it still feels solid. Check that the bar itself hasn't bent or deformed, particularly if it's been used for pulling up from a seated position.
Pay special attention to any changes in how the bar feels over time. A grab bar that was once rock-solid but now has slight movement needs immediate attention - even minor loosening can progress quickly once fasteners begin to shift. Tighten hardware at the first sign of any change, and if tightening doesn't restore rigidity, the fasteners may have damaged the wall material and require relocation or reinforcement.
Document your installation date and testing schedule. A simple note on your phone or calendar ensures you won't forget monthly checks, and tracking when you last tightened hardware helps you spot patterns that might indicate an underlying installation issue. Regular testing isn't about doubting your work - it's about maintaining the safety margin that proper installation created.
Getting It Right the First Time
When it comes to bathroom grab bars, the product you choose matters far less than how you install it. Even the most robust bar becomes a liability when mounted incorrectly, and the four mistakes covered in this guide - skipping stud anchors, choosing the wrong height, using inadequate hardware, and relying on suction cups - account for the majority of grab bar failures.
Secure installation isn't complicated, but it does require patience and verification at every step. Locate studs with a finder and confirm by drilling pilot holes. Measure placement height based on who will use the bar and the specific task it will support. Match fasteners to your wall type and load requirements, using blocking or toggle anchors when studs aren't available. And reserve suction devices for temporary, very light-touch use only.
The time you invest in proper installation directly translates to years of reliable support. Rushing the process or cutting corners on hardware saves minutes but creates risk that compounds over time. Every grab bar should feel immovable when you pull with full body weight - if there's any flex, shift, or give, the installation needs correction before the bar is put into service.
Installation quality is the single most important safety decision you'll make when modifying a bathroom. Get the mounting right, and the grab bar becomes a stable, confidence-building part of daily routines. Get it wrong, and it becomes a false promise that can lead to serious injury. Prioritize secure attachment over convenience, verify your work before regular use, and treat every fastener as a critical component of fall prevention.
Pre-Installation Checklist: What to Verify Before You Drill
- Identify wall type: drywall with studs, tile over drywall, fiberglass, or other material
- Locate studs with electronic stud finder; mark vertical stud centers on wall
- Measure user height and mobility range to determine optimal bar placement
- Verify mounting hardware matches your wall construction (may need to purchase separately)
- Check that bar placement aligns with at least one stud on each end, or plan for backing board
- For fiberglass: confirm you have spacer kit or backing plates to distribute load
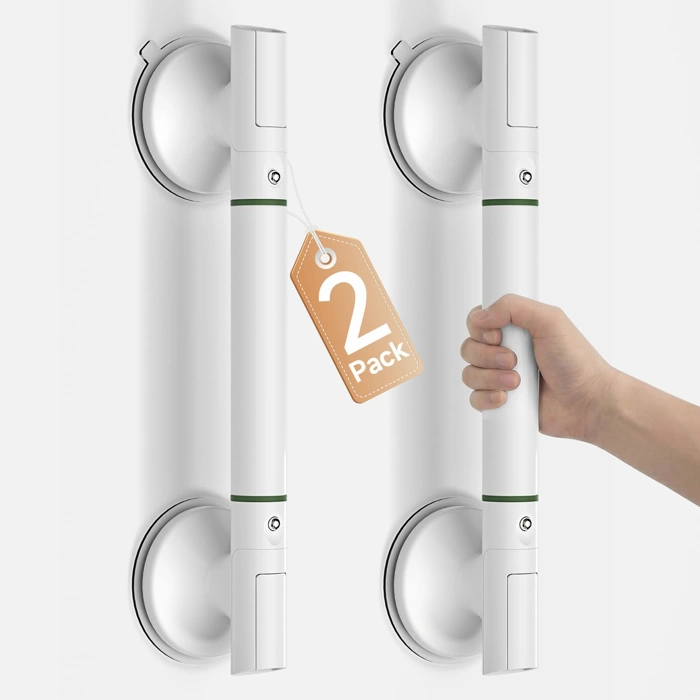
DOZAWA 17.7-Inch No-Drill Suction Shower Grab Bars, 2 Pack
The DOZAWA 17.7-Inch No-Drill Suction Shower Grab Bars arrive as a 2-pack for $39.99, carrying a 4.4 out of 5 rating. These bars rely on suction cups rather than wall anchors, making them a rental-friendly option when permanent installation isn't possible or desired.
Suction grab bars work only on perfectly smooth, non-porous surfaces - flat tile, tempered glass shower doors, or acrylic panels. Any texture, grout line, or porous finish will prevent a secure seal. Before every use, clean both the wall and the suction cups with rubbing alcohol to remove soap residue, body oils, and mineral deposits. Press each cup firmly, then engage the locking mechanism and confirm the indicator shows a secure hold.
This 2-pack is best suited for light stabilization while stepping into the shower or shifting weight during bathing. They are not designed for full weight-bearing transfers or the forces involved in lowering onto a shower seat. If you need support for those movements, a screw-mounted bar anchored into wall studs or blocking remains the safer choice.
Inspect suction integrity at least weekly. Temperature swings, humidity, and cleaning product residues can gradually weaken the seal. If a cup loses vacuum or shows any gap at the edge, remove the bar, clean both surfaces thoroughly, and reattach. Replace the unit if suction performance doesn't return.
The 17.7-inch length offers a compact grip span. In narrow shower stalls where drilling might hit plumbing or fall between studs, this suction model provides a stopgap solution. Pair it with a permanent grab bar outside the shower for entry and exit support, reserving the suction bars for interior balance assistance on suitable surfaces.
- ✅ No drilling required - suitable for rentals or tile you cannot modify
- ✅ 2-pack provides coverage for two grip points at $39.99
- ✅ Works on smooth glass, tile, and acrylic where surface is flat and non-porous
- ⚠️ Not appropriate for full weight-bearing transfers or lowering onto seats
- ⚠️ Requires perfectly clean, non-textured surfaces and frequent inspection
- ⚠️ Suction can fail if soap residue, temperature, or humidity compromises the seal
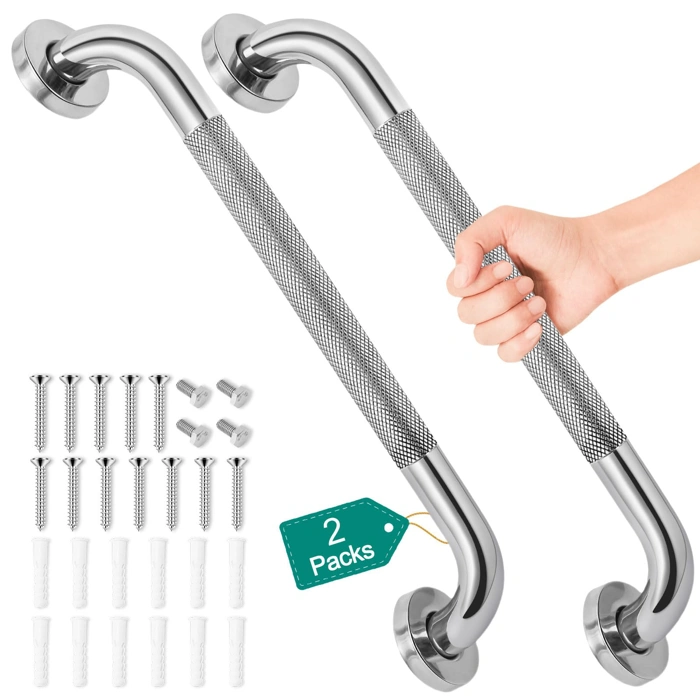
16-Inch Stainless Steel Anti-Slip Grab Bars for Bathtubs & Showers, 2 Pack
At $13.99 for a two-pack, these 16-inch stainless steel grab bars offer a budget-friendly permanent-mount solution for bathtubs and showers. Rated 4.6 out of 5, the bars feature a textured grip surface designed to reduce slip risk when wet, making them suitable for daily use in humid bathroom environments.
The stainless steel construction resists rust and corrosion, which is essential for long-term durability in wet conditions. However, these grab bars require drilling into your wall and proper anchoring to deliver reliable support. Success depends entirely on correct installation: you must locate wall studs or use appropriate backing and hardware for your specific wall type. Skipping this step - one of the most common installation mistakes - can compromise safety and create a false sense of security.
The tradeoff is clear: while permanent installation demands more effort and commitment than suction or adhesive alternatives, properly anchored grab bars provide dependable, long-term support. The textured surface improves grip even when hands are soapy or wet, and the 16-inch length fits most standard bathtub and shower configurations.
This two-pack works well when you need multiple anchor points - such as entry and exit positions in a tub - without significantly increasing cost. Just remember that the value proposition only holds if you invest the time to install them correctly into studs or with the right wall anchors for drywall, tile, or fiberglass surrounds.
- ✅ Affordable at $13.99 for two bars
- ✅ Textured grip surface reduces slip when wet
- ✅ Stainless steel resists rust and corrosion
- ✅ 16-inch length fits most standard tub and shower spaces
- ⚠️ Requires drilling and commitment to permanent installation
- ⚠️ Safety depends entirely on correct anchoring into studs or appropriate backing
- ⚠️ Installation mistakes can compromise reliability
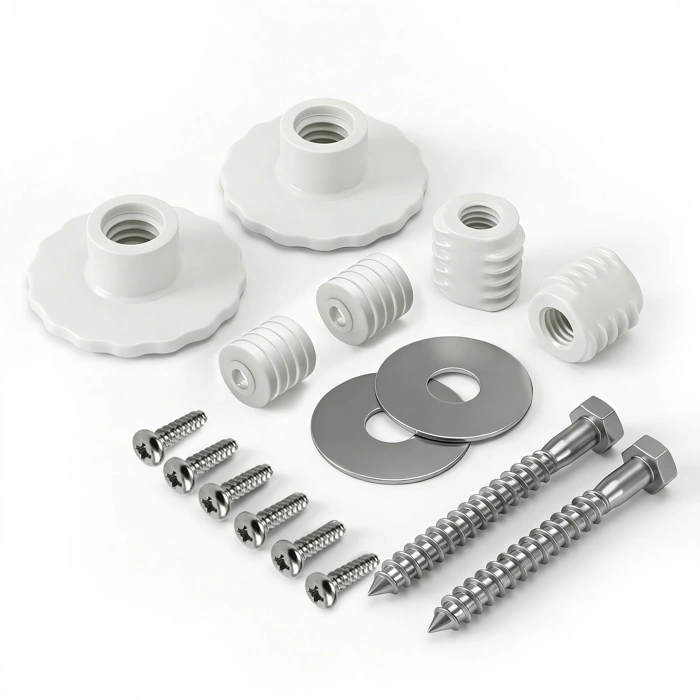
RotoVent Grab Bar Mounting Kit for Fiberglass Showers, Adjustable Spacers, 1 Pair
The RotoVent Grab Bar Mounting Kit is designed specifically to solve the fiberglass installation challenge. Thin fiberglass walls flex under pressure, and without proper reinforcement, even correctly placed grab bars can crack the enclosure or pull free when weight is applied.
This kit includes adjustable spacers that distribute load across a wider area behind the fiberglass surface. By creating a reinforced mounting point, the spacers prevent the concentrated stress that causes cracks around fastener holes. The adjustable design accommodates different wall thicknesses and grab bar models.
At $29.99 with a 4.3/5 rating, this mounting kit pairs with any standard grab bar to create a secure anchor in fiberglass showers or tub surrounds. It addresses the structural weakness inherent in thin-wall enclosures by spreading force across a larger footprint rather than relying on small contact points alone.
Installation still requires locating solid backing or using appropriate hollow-wall anchors where studs aren't available, but the spacer system adds a critical layer of reinforcement between the grab bar and the fiberglass itself. This is particularly important in retrofit situations where adding blocking behind the wall isn't feasible.
The kit is an essential accessory when installing grab bars in any fiberglass enclosure, turning a vulnerable installation into a properly reinforced one.
- ✅ Adjustable spacers accommodate different wall thicknesses
- ✅ Distributes load to prevent fiberglass cracking
- ✅ Works with standard grab bar models
- ✅ Addresses structural weakness in thin-wall enclosures
- ⚠️ Adds $29.99 to installation cost
- ⚠️ Still requires proper backing or anchors behind fiberglass
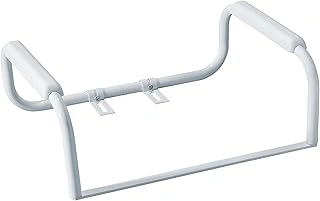
Moen Glacier White Toilet Grab Bar, DN7015
The Moen Glacier White Toilet Grab Bar (DN7015) offers a fundamentally different installation approach that sidesteps many common wall-mounting mistakes. Instead of drilling into studs or searching for adequate backing, this bar mounts directly to the toilet base using the existing floor bolts that secure the toilet itself.
Priced at $39.30 with a 4.4/5 rating, this design reduces concerns about wall type, stud location, and anchoring depth. The bar attaches alongside the toilet's mounting flange, placing a secure grip exactly where it's needed for toilet transfers - the bathroom activity with the highest fall risk for many users.
The tradeoff is compatibility: this solution requires a floor-mounted toilet with accessible mounting bolts and adequate clearance around the base. Wall-hung toilets, skirted designs that conceal the floor connection, or installations where the floor bolts are grouted over won't work. You'll also need to ensure the existing floor bolts are in good condition, as the grab bar relies on the same fastening system that holds the toilet secure.
For bathrooms where wall installation poses structural challenges - tile over metal studs, unknown wall composition, or thin drywall - the toilet-mounted approach removes uncertainty. The bar's positioning naturally supports sitting and standing motions, and because it's anchored to the same bolts holding a 70-pound fixture in place, the attachment point is inherently stable when properly installed.
This isn't a universal solution, but when your toilet configuration allows it, the Moen DN7015 avoids the stud-finding, wall-penetration, and backing concerns that lead to weak installations elsewhere in the bathroom.
- ✅ No wall drilling required - mounts to existing toilet floor bolts
- ✅ Eliminates stud location and wall-type guesswork
- ✅ Positions support directly at the highest-risk transfer point
- ✅ Uses the same anchoring system that secures the toilet itself
- ⚠️ Only compatible with floor-mounted toilets with accessible bolts
- ⚠️ Won't work with wall-hung or fully skirted toilet designs
- ⚠️ Requires floor bolts to be in good structural condition
- ⚠️ Installation depends on clearance around toilet base